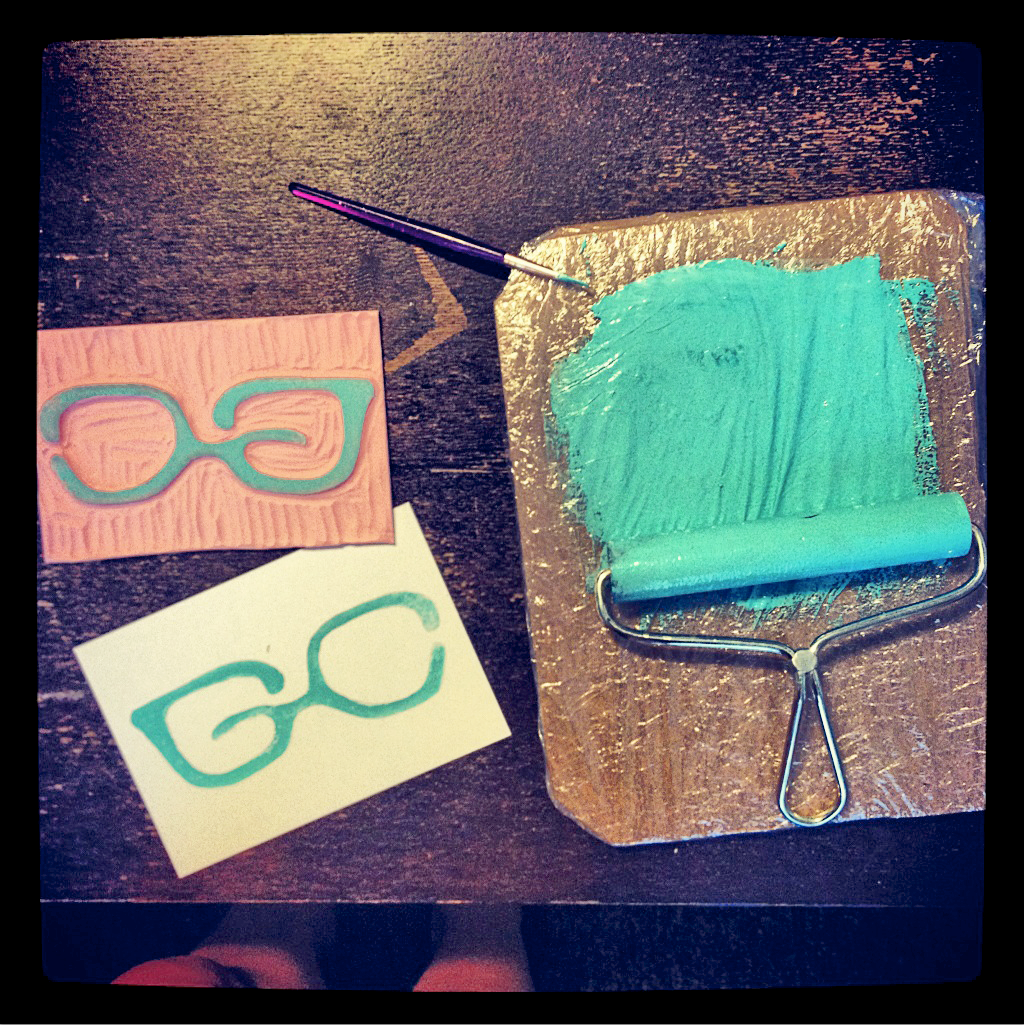
Now that I have my new branding in place, I have decided that I want to make a lot of my products, marketing pieces, etc. hand made or at least have the look of such. My first step was to make a homemade stamp for cards. This is something that is totally fun and easy. It is also a great method for making art, gifts, etc!
What you will need:
1. Printed image of whatever you want to make a stamp of (PRINT THIS BACKWARDS)
2. Pencil or graphite stick
3. Speedball Speedy-Carve Block or something similar (could use linoleum block as well, however, it is much more difficult to cut and work with)
4. Some sort of linoleum cutter
5. Block printing inks
7. Card stock
1. The first thing I did was print out my logo. An important thing to remember is to PRINT YOUR LOGO BACKWARDS. 2. Once printed, you will want to turn the paper over and cover the back with graphite. This step will allow you to directly stencil your image onto the stamp block. 3. Once the back of the paper is covered in graphite, place the image (image side up) on top of the Speedball Speedy-Carve Block and, pressing moderately hard (without piercing through the paper), trace the outline of the image. 4. When you have fully traced your image, remove the paper. You should see that the image has transferred onto the block from the graphite coating. 5. The next step is to dig away! You will use the linoleum cutter to slowly remove layers of the rubber around your image. You want to make sure that your cut is deep enough to not pick up ink when rolling your image, however, you also don’t want to go so deep as it will make the empty space of your stamp too flimsy. *I suggest first cutting an outline around your image with the thin, deep cutting tool. This will hopefully prevent you from cutting into your image when removing the rest of the dead space from your stamp. 6. Once your logo or image is the only part protruding from your block, you are ready to start stamping! 7. Simply pour some of the ink onto a smooth surface (glass is ideal) and evenly cover your Soft rubber brayer by rolling it over the inks. It is best to do this in multiple directions as to completely coat the surface. 8. After that, you will lightly roll the Soft rubber brayer over your stamp. If you find that ink is getting onto other areas of the block that are not part of your desired image, it probably means you need to remove more of the rubber. For small mistakes, a damp cloth will help to remove ink from unwanted areas. 9. Once the ink is on your stamp, simply line it up with your card stock, (or whatever you may choose to print on) and press firmly. It helps to have another clean Soft rubber brayer to roll on the back of the block to get an even transfer without moving/smearing the block across the paper. This process definitely takes some finessing, however, it is a fun and pretty easy way of making great DIY marketing tools or gifts!

Reblogged this on bellusdesigns and commented:
Check out this awesome tutorial: simple and easy DIY method for turning digital designs into a rubber stamp!
VERY cool! I love your logo and this DIY!